-
Managing Udemy Business licenses
Read articleThis article outlines how Udemy Business admins can assign and remove Udemy Business licenses for learners in the new license experience.
Note: If your organization joined Udemy Business before February 16, 2026, please see these instructions for managing Udemy Business Pro licenses instead, while we transition customers to this new experience.
Please note:
- You’ll need to have purchased a Udemy Business add-on to assign licenses.
- For customers who have SSO/SCIM, licenses will be automatically assigned when users authenticate via SSO/SCIM.
- All SCIM users can have licenses managed via the mechanisms outlined below.
- For customers who have a specific Udemy Business license for some learners, but not all, the license can be assigned to any active user or at the same time a UB license is assigned.
- Only admins can assign and remove Udemy Business licenses. Admins can also assign (and unassign) a Udemy Business license for admins and group admins, including themselves, if required.
Table of contents
- How to assign Udemy Business licenses
- How to invite users and assign a Udemy Business license via email
- How to assign Udemy Business Pro licenses via CSV Import
- How to edit license type for pending invitations
- How to remove Udemy Business Pro licenses
- How to assign or remove Udemy Business Pro licenses via SCI
How to assign Udemy Business licenses
You can assign Udemy Business licenses to users individually, or in bulk via CSV Import.
- Note: Only admins can assign and remove Udemy Business licenses.
To assign a license to an individual user:
2. In your Udemy business account, navigate to Manage > Manage Users.
3. Locate the user by entering their name or email address into the search tool, or by selecting the checkbox next to their name on the list of all users.
4. Click the three vertical dots on the right side of the user's row and click Edit license type.
- Note: You can also access this option from the user’s profile page.
5. On the Edit license type pop-up, select the license you want to assign to the user.
6. Click Save changes.
The user will receive an email notification, prompting them to log in and access the features for their new Udemy Business license.
How to invite users and assign a Udemy Business license via email
You can also assign a Udemy Business license using the checkbox when you're inviting new users to Udemy Business.
1. Navigate to Manage > Manage users, and click Invite New Users.
2. Click Individual email addresses and add the email addresses of the users you want to invite.
On step 2:
- Choose a license add-on to allocate to the new user. This automatically gives the selected learners access to the add-on’s features when they accept their invitation to join Udemy Business.
On step 3:
- If you want to add the users to groups, select the desired groups.
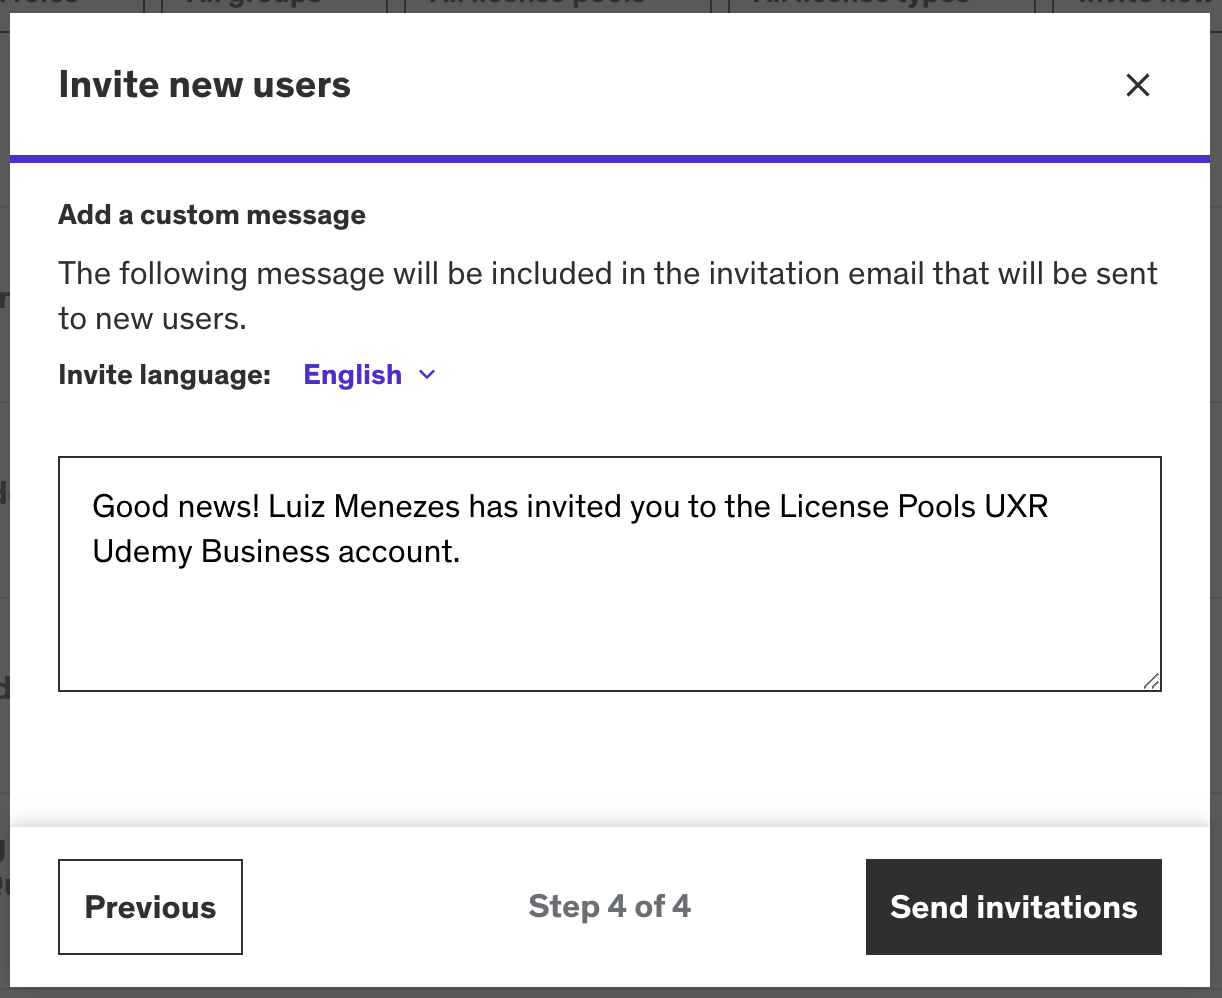
On step 4:
- Select the language you'd like to issue the invitation in.
- Add a custom message to send with the invitation, if you wish.
3. Click Send invitations.
How to assign Udemy Business Pro licenses via CSV Import
If you wish to assign Udemy Business Pro licenses to more than one user, you can do so easily by importing a CSV file.
How to edit license type for pending invitations
You can edit the type of license for pending invitations (users who have been sent an invitation email but haven't accepted it yet).
To edit the license type:
1. Navigate to Manage Users > Pending Invitations and locate the user.
2. Click the three vertical dots on the right side of their row and click Edit license type.
3. Select the license type and click Save changes.
How to remove Udemy Business add-on licenses
If you want to move a learner back to an Enterprise only license:
- Navigate to Manage > Manage Users.
- Locate the user by entering their name or email address into the search tool, or by selecting the checkbox next to their name on the list of all users.
- Click the three vertical dots on the right side of the user's row and click Edit license type.
- On the Edit license type pop-up, click Enterprise, then click Save changes.
The learner will no longer have access to the features associated with their previous license add-on, but they'll still have access to Udemy Business. Additionally, Udemy Business reporting for the previous license will be retained for this user.
- If you wish to remove a user completely from your Udemy Business account, you can follow these instructions.
How to assign or remove Udemy Business licenses via SCIM
If you manage your users in Udemy via SCIM, you can assign and remove Udemy Business licenses via this method.
Using the licenseTypes attribute in SCIM API
By adding the LicenseTypes attribute to your Identity Provider, you can add and remove Udemy Business Pro licenses for a user.
Once set in your Identity Provider, and providing there are available licenses, active users will receive their Udemy Business Pro license. Inactive users will receive their license at activation.
Review how organizations can use Udemy’s SCIM API to add or remove user licenses
-
Inviting users
Read articleThis article outlines how Udemy Business admins and group admins can invite new learners to join the account, and steps they can take if invitations are not being received.
Table of contents
- How to invite users
- How to invite users via the individual email addresses option
- How to invite users via the bulk CSV import option
- Inviting and assigning users a Udemy Pro license
- Selecting a language for your invitations and including a customized message
- Allowlisting emails
- How users accept their invitations
- Invitations and license usage
- What to do if invitations are not being received
- Pending and resending invitations
- Resending multiple invitations
- Single Sign-On (SSO) accounts
- SCIM (System for Cross-Domain Management) accounts
How to invite users
To invite new users, navigate to the Manage tab at the top right of your account and click on Manage Users from the dropdown menu. Users can be invited via the Individual email address option or by CSV import (note: only admins can use the CSV import option).
1. Click the Invite New Users button
2. Click on Individual email addresses to invite people one by one.
3. To bulk import users via a CSV import, click on Import users from CSV. Please note: Currently only admins have access to the CSV import feature.
How to invite users via the individual email addresses option
1. After navigating to the Manage users page, click the Invite New Users button.
2. Next, add individual email addresses to invite people one by one.
3. For customers who created license pools for their Udemy Business site:
- For admins: Select the license pool from which the invited users licenses should come from
Please note: Only Udemy Business admins have visibility and control over license pools. The license pool for group admins who can invite users is automatically determined based on their invite permission therefore the option to select license pools is omitted.
- Learn how to create and manage license pools.
4. For customers who have purchased Udemy Business Pro to assign Pro licenses:
-
- If you wish to assign a Udemy Business Pro license to the invited users, click the checkbox for ‘Pro license’ under Select License add on. This will automatically give the selected learners access to Udemy Business Pro features when they accept their invitation to join Udemy Business
Please note: For customers who have acquired Pro licenses for all Udemy Business users, the 'Pro license' checkbox will be automatically selected and disabled. This ensures that Pro licenses are automatically assigned when invitations for Udemy Business are accepted.
- Learn how to invite a user and assign them a Udemy Pro license.
5. If you wish to add the invited users to specific groups, select them from the list.
6. Finally, select the language you would like to issue your invitation in and add a custom message if you wish (please see below for more information). Click Send invitations.
How to invite users via the bulk CSV import option
- Learn how to add and manage users via CSV import.
Inviting and assigning users a Udemy Pro license
- Learn how to assign and remove Udemy Business Pro licenses.
Selecting a language for your invitations and including a customized message
Admins and group admins can also select the language of the invitation they are sending and include a customized message if they wish.
- Please note that while the invitation template will be localized in the language you’ve selected, any customized message you include will not be translated into a different language.
After you select a language, the invitation and following invitation reminders will be issued in that language to the user indicated.
If you choose to add a custom message it will appear at the top of the invitation.
Allowlisting emails
If your company's firewalls are generally restrictive (certain commonly used sites are blocked), you will need to allowlist certain emails from Udemy Business to ensure delivery of invitation emails and operation of the password reset function. Learn more about allowlisting the email sending domains and subdomains for Udemy Business.
How users accept their invitations
Invited users will receive an invitation via email to join Udemy Business. The subject line of the email will include your company's Udemy Business account name; for example, Invitation to Company's Account. The invitation email will be sent from e.udemymail.com, but the email address of the admin who sent the invite will also be shown before that address. For example, john.smith@company.com via e.udemymail.com.
After inviting users to your account, an invitation email will automatically be sent to those users. The email will link users to your Udemy Business account, where they’ll enter their name and email, create a password. Users will be prompted to verify their account information, via a verification email with a link, which will expire in one hour*. Once they activate their account through a verification email, they’ll be able to log in for the first time, and start learning. If the user does not respond to the invitation email within 48 hours, the system will automatically send an invitation reminder to them.
*Please note that Single Sign-On (SSO)/System for Cross-Domain Management (SCIM) users will not be put through this verification flow.
Invitations and license usage
Invitations do not consume a license until the user has signed up for their account. If a license is no longer available by the time the user tries to sign up, the user will land on an error message page. On the error message page they will be asked to contact the administrator who invited them for further assistance.
For customers who have purchased Udemy Business Pro licenses for all users, Pro licenses will be automatically assigned when invitations are accepted by users, or when they authenticate via SSO/SCIM.
What to do if invitations are not being received
If your users are not receiving email invitations to join your account, please have them check their spam folders. If they still do not receive any invitation emails, and your organization has allowlisted the Udemy Business emails, please have them contact our Support Team directly for further assistance.
Pending and resending invitations
To view the Pending invitations page, click Pending invitations at the top left-hand of the Manage users screen.
On the Pending invitations page, you can check who has not yet accepted their invite, and resend or cancel an invitation for an individual user, by clicking the applicable icon. You can also resend pending invitations to all users at once by clicking Resend all on the right side of the page.
The name of the inviter will also appear in pending invitations, if they sent individual invitations or uploaded the user's email address in bulk through the CSV import. If you sent the invitation to the user it will read "Invited by me".
Resending multiple invitations
To resend multiple invitations, you can select multiple users by clicking the checkbox on the left. Once a selection is made, a panel will appear where you will have the option to resend or cancel multiple invitations.
Please note: Internet Explorer does not allow copying and pasting from Excel into field 1 of the inviting users tool. Users will need to use Chrome or another browser.
Single Sign-On (SSO) accounts
If you have configured SSO and have enabled auto-provisioning in your Settings for SSO, you can grant users access to Udemy Business in your organization’s Identity Provider. You do not need to invite users one by one within your account, nor do you need to import them through a CSV file.
If you have auto-provisioning disabled, however, you will need to invite users via the above methods (in addition to provisioning access via your SSO directory).
SCIM (System for Cross-Domain Management) accounts
If you have enabled SCIM for provisioning, you can grant users access to Udemy Business in your organization’s Identity Provider and do not need to invite users one by one.
-
Adding more licenses to your account
Read articleAs you continue to provide learning opportunities for your employees, you can easily add more licenses to your Udemy Business account. This article explains how to add more licenses to your Team or Enterprise Plan account, as well as how to upgrade to an Enterprise Plan account.
Enterprise Plan & Udemy Business Pro Admins
If you're an Enterprise Plan or Udemy Business Pro admin and need to purchase more licenses, you may reach out to your account executive directly or our Support Team can assist.
To begin submitting a request for assistance to our Support Team via our contact form, select Admin, Account administration, Licenses, billing and renewals, and then Purchasing more licenses.
Team Plan Admins
If you're a Team Plan admin, follow the steps below to add more licenses to your account.
Note: The total price for a team plan is calculated on a prorated basis, based on today's date and the end date of your yearly subscription.
How to add more Team Plan licenses
1. Click on Manage at the top right corner of your screen.
2. Under Settings, click Billing.
3. Under Subscription, click Buy more Team Plan licenses, and follow the instructions to complete your payment. You'll be able to purchase up to 20 licenses in your Team Plan account.
How to upgrade from Team Plan to Enterprise plan
If you wish to purchase more than 20 licenses, please follow the instructions below to upgrade to our Enterprise Plan.
Team plan organizations: Please complete the information in our Enterprise Plan Upgrade form. A member of our Sales Team will be in touch to assist with your request.
Japan Team Plan organizations: A separate process is required to upgrade to our Enterprise Plan in Japan. Please fill out our contact form to connect with our sales agent in Japan.
- Please specify that you are inquiring about a Team Plan upgrade.
-
Managing roles and permissions in Udemy Business
Read articleUdemy Business account administrators are able to assign the roles of other learners in their account, depending on the types of permissions they require.
How to assign or update roles
If you need to assign or update the role of others in your organization, follow the steps below
1. From the home page in your account, hover over Manage in the top right corner.
2. Select Manage users from the dropdown
3. Begin typing the learner's name in the Search users bar. The user list below will update as you type to display relevant results
4. Once you locate the desired learner, click the ellipses to the right of the user’s name
5. Select Edit role. Admins can also change a role when the status of an invitation is still pending.
6. Select Admin, Group Admin, or User.
If you’re assigning a group admin role, select these options if you want to grant these permissions:
- Allow user to invite and deactivate users within the groups they manage
- Allow user to add existing users to groups they manage.
7. Click Save changes.
You can also manage learners' roles in bulk by importing a CSV file to your account.
Group admins
Enterprise plan users can also assign group admins.
- Groups can have multiple group admins.
- Only admins can designate users as group admins.
- Admins can create group admins in bulk via CSV upload.
- Admins can choose whether to allow group admins to add, invite, and deactivate users in the groups they manage
Learn more about group admins and what they can do.
How to check who is an admin
You can check to see who has admin access by selecting the admins filter in the dropdown menu at the top of the Manage Users page.
-
Email reminders for low license availability
Read articleThis article describes how to set up email notifications to alert admins and owners when license availability is running low.
If your organization's license limit is reached, new users won't be able to access the platform until more licenses are made available in your account.
- Learn about adding more licenses to your account.
How to configure email reminders for low license availability
To set up email reminders for admins:
- Go to Manage > Settings > Email reminders.
- Click the Email reminder enabled option.
-
On the Send email when dropdown, choose your license threshold from these options:
- 95% or more of licenses have been assigned
- 98% or more of licenses have been assigned
- 100% or more of licenses have been assigned
Note: Once enabled, if your specified threshold has been reached, all admins and owners will receive the email reminder once a month.
-
License pools: Adding users with SSO / SCIM
Read articleThis article outlines how admins can add users to license pools via SSO (SAML) or SCIM methods.
- Learn more about the features, benefits, and applications of license pools.
- Learn how to create and manage license pools
- License pools are exclusively available for Enterprise Plan organizations
A user can only be in one license pool at a time, so moving a user to a pool will remove them from their existing pool.
Glossary
License Pool: A license pool allows organizations to allocate a certain number of licenses to that pool. This is useful when different groupings within an organization have been allotted a specific number of licenses. Learn more.
Default License Pool: Every organization starts with a default license pool. This pool acts as a fallback and cannot be deleted or have its name changed.
Custom License Pool: A custom license pool is any license pool the organization creates.
IdP: Customer’s identity provider.
Using SSO to adder users to license pools
Initial setup
Step 1: Admins create license pools in their organization’s Udemy Business account. Learn how.
Step 2: Admins create groups in their IdP with the
licensePoolNameattribute matching the license pool they have created in Udemy Business. (The attribute may be assigned on an individual basis, in the IdP, if that is the customer’s preference.)
Usage
If the admin has not created any custom license pools in their Udemy Business account, the licensePoolName attribute will be ignored in the SAML request.
If custom pools exist in the organization and the licensePoolName attribute is filled, our system will expect a valid name of a pool (an exact match, not case sensitive), or it will accept the string “default license pool” to signify the user should go to the default license pool.
If there is not an exact match, the system will reject the request and show the user the appropriate error message.
If the specified license pool is full, and the user is not already in the pool or is in the pool but deactivated, our system will reject the request and show the appropriate error message.
Important: When managing a user’s license pool allocation via SSO, the user’s license pool must be changed in the IdP. Changing the user’s pool in Udemy Business will be reverted back to the IdP’s settings once the user logs in.
Important: Changing the name of the license pool in only Udemy Business, so that it does not match the license pool name used in the IdP, will result in the SAML request being rejected and the user will be unable to log in.
Using SCIM to add users to license pools
SCIM will use the licensePoolName attribute.
Initial setup
Step 1: Admins create license pools in their organization’s Udemy Business account. Learn how.
Step 2: Admins create groups in their IdP with the licensePoolName attribute matching the license pool they have created in Udemy Business.
Usage
The admin will include the licensePoolName attribute in SCIM requests.
If the admin has not created any custom license pools in their Udemy Business account, the licensePoolName attribute will be ignored
If custom pools exist in the organization, we will expect a valid name of a pool (exact match, not case sensitive) or the string “default license pool” to signify the user should go to the default license pool. A blank field for the attribute will be assumed as the default license pool.
If there is not an exact match, the system will reject the request and show the appropriate error message in the IdP.
- Behaviour if licensePoolName attribute does not match a license pool in Udemy Business:
- Provision
- Reject and show error message in IdP.
- User Update
- Provision
- Reject and show error message in IdP.
- Behaviour if the target license pool is full and has no remaining licenses left:
- Provision
- User will be provisioned with the pending status. If the pool is still full when they try to login for the first time, they will receive an error.
- User Update
- Reject and show error message in IdP.
- Provision
-
License pools: Features, benefits, and applications
Read articleThis article explains license pools and how admins can use them to set a number of licenses for specific departments or teams.
Please note:
- License pools are exclusively available for Enterprise Plan organizations
What are license pools?
License pools is a feature that enables Udemy Business site administrators to allocate a set number of licenses for specific users during the invitation process. Admins can create license pools with a set number of licenses that correspond to a department or team, and assign active users to a designated license pool.
Group admins can also be assigned to license pools, to distribute licenses from it to other users.
When a group admin invites a user to join Udemy Business, their license is taken from the license pool managed by that group admin. Additionally, active users can be designated to a license pool.
- Learn how to create and manage license pools.
- Learn more about assigning license pools to learners.
License pools have the following attributes:
- Name: The name of the license pool, chosen by the admin.
- Number of Enterprise licenses: Maximum number of Enterprise licenses that can be assigned to users from this pool.
- Number of Pro licenses: Maximum number of Pro licenses that can be assigned to users (Pro customers only) from this pool.
- Licenses used: Number of licenses assigned to active users. When users accept invitations or are moved to license pools this number increases. When users are deactivated or moved to another pool, this number decreases.
- Licenses remaining: Balance of licenses available to allocate. This number represents the difference between the maximum number of licenses and the number of licenses used in that pool.
Please note: License pools are subsets of customers’ active subscriptions. When creating a pool, it's essential to set allowances for all active products. An allowance of zero is accepted. For instance, if group admins shouldn't consume pro licenses and no user is being assigned to the pool initially, a limit of 0 must be specified for the pro product when creating a license pool. Important rules about license pools:
- Each user can only be assigned to one license pool
- Group admins can only be granted permission to allocate licenses from a single license pool
- The combined license allowance of license pools for a product type cannot exceed the total number of licenses in the active subscription for that product type.
The default license pool
When creating a license pool for the first time, a default license pool is automatically generated and displayed on the license pools page.
The default license pool serves as the default destination for various actions and processes within your Udemy Business site. Here’s what happens when the first license pool is created:
- All active users are assigned to the default license pool
- All reactivated users are also assigned to the default license pool unless specified otherwise while reactivating.
- Pending invitations are directed to the default license pool unless specified otherwise on the pending invitations page.
- 'If SCIM (System for Cross-domain Identity Management) is enabled, all SCIM provisioned users are automatically assigned to the default license pool
- Group admins who can invite users are automatically granted permission to the default license pool
Additionally, the default license pool is utilized in processes where users are created without an explicit invitation, such as through approved domain or SCIM and SSO provisioning. The exception is unless a custom license pool is specified in the SSO or SCIM request.
Finally, when a license pool is deleted, the available licenses and assigned users from the deleted pool are reassigned to the default license pool. Similarly, group admins who were granted permission to the deleted license pool will automatically receive permission for the default license pool.
License pool impacts from subscription license modifications
One important aspect of the default license pool is its adaptability to subscription changes. If you modify the number of licenses in your subscription during renewal, the license limit for the default license pool will adjust accordingly.
What is the difference between license pools and user groups?
License pools and User groups might seem alike, but they're actually different. License pools and user groups are not directly linked to each other, although groups can be used to move active users to a license pool during the license pool setup.
The table below includes additional examples of how license pools and user groups differ.
License pools User groups License pools allows Udemy Business site admins to determine a number of licenses that can be used by specific users during the invitation process User groups allows Udemy Business site admins to categorize and organize users based on common characteristics or shared attributes License pools can be set up in a way that they represent organization units such as a region, department, cost center or even a group of individuals Groups can be set up in a way that represents an organization structure or organized in themes or subjects for learning License pools are related to subscriptions and literally represent a partition of the subscription Groups are related to users and represent a set of users License pools empower admins by simplifying license management and license allocation Groups enable group admins to see reporting and insights specific to groups they manage, assign courses within their groups, manage the users in their groups, and invite new users if they have the permissions to do so Users are always assigned to a license pool and that represents where users’ licenses originate from Users may not be members of groups. In other words, there may be users who are not members of groups Users can be assigned to one license pool only Users can be members of several groups Group admins can be granted permission to invite from one license pool only Group admins can manage several groups -
Assigning license pools to learners
Read articleThis article explains how admins can invite and assign learners to license pools, as well as, track license availability across various organizational units.
- Learn more about license pools.
- Learn more about creating and managing license pools.
- Review how admins can add users to license pools via SSO (SAML) or SCIM methods.
Please note:
- License pools are exclusively available for Enterprise Plan organizations
Table of Contents
- Inviting users with license pools
- Assigning Pro Licenses
- Moving users to license pools
- Seeing users assigned to license pools
Inviting users with license pools
Only Udemy Business admins have visibility and control over license pools. They can view license pool details including limits, permissions for inviting users, and user assignments. Additionally, admins can select any license pool when inviting users.
Group admins, on the other hand, have no visibility into license pool details. This results from automatic license pool assignments when group admin permissions are granted for inviting and deactivating users. Consequently, any invitations created by group admins are associated with the designated license pool. In this case, upon acceptance of an invitation created by group admins, the user's licenses are drawn from the license pool the group admins have permission to invite from. This approach ensures efficient license management, with real-time updates to available license balances.
- Learn more about inviting users.
Please note: Important rules about user sign-up with license pools:
- SSO or SCIM provisioned users will draw licenses from the default license pool.
- Users who sign up via the approved domain feature will also consume licenses from the default license pool, unless SSO or SCIM is set up to send users to a specific license pool.
Assigning Pro Licenses
With the introduction of license pools, group admins can allocate licenses from the license pool they have permission to for all product types. This means group admins can now assign Udemy Business Pro licenses to active users they manage or to users they invite.
- Learn more about assigning & removing Udemy Business Pro Licenses
- Note: If your organization joined Udemy Business after February 16, 2026, please see these instructions for managing licenses in the new experience. We’re working on moving all customers to the new experience soon.
Moving users to license pools
When license pools are created, you can move users to the license pools during creation or after they are set up.
To move active users to a license pool, please follow the steps outlined below:
- Access the license pools tab from the Manage licenses option. This option is available on the Manage users dropdown on the left of the Admin tools.
- Select the license pool you wish to assign users to by clicking on the ellipses icon (three-dots) next to the license pool name. Next, select the action Edit license pool.
- For this action, it is possible to move users individually or indirectly by selecting a group of users.
4. Begin typing the user’s or group’s name you want to move to this license pool. The list below will update as you type to display relevant results. Once you locate the desired user or group, select them. You can repeat this step as many times as needed.
- Note: License pools and user groups are not directly linked to each other, although groups can be used to move active users to a license pool during the license pool setup. Adding a group is a one-time action that adds only the current group members.
5. After completing this step, click Next.
6. In the next step, a summary of the updated license pools page will be displayed. The balance for the number of licenses used in the applicable pool will be updated, including newly added users. Click Save to finalize the updated license pools.
7. A confirmation notification will also appear at the bottom of the page indicating that the process was successful
If the number of selected users exceeds the available licenses in the chosen license pool, a warning message will be displayed. The message will prompt you to either adjust the license limit on the selected pool or choose fewer users.
Seeing users assigned to license pools
Udemy Business admins can view users assigned to license pools at any point by either using the license pool filter in the manage users section or from the license pools page:
From the manage users section:
- Select All users or Licensed users from the admin tools menu
-
Select the desired license pool on the license pool filter
- The list of users will be filtered and displayed according to the selected license pool
From the license pools page:
- Access the license pools tab on the Manage licenses option from the Manage users dropdown on the left of the Admin tools.
- Select the license pool you wish to assign users to by clicking on the ellipses icon (three-dots) next to the license pool name. Next, select the action See members
- The list of users will be filtered and displayed according to the selected license pool
-
What can group admins do?
Read articleGroup admins help drive effective learning engagement across an organization. We believe the best learning happens when team managers or those closest to the learning goals of employees can help drive learning forward. This article outlines what group admins can do, in comparison to admins.
- Note: group admin functionality is only available in the Enterprise plan.
What can group admins do?
The group admin feature enables team leads and managers to connect learners with the right course for their professional development. Group admins can also see reporting and insights for their groups and assign courses within their groups. You can also allow group admins to invite new or existing users to groups they manage.
Groups can have multiple group admins, and admins can choose whether to allow group admins to add existing users, invite new users, and deactivate users in the groups they manage.
Group admins can:
- Assign courses to users and groups, for the groups they manage.
- Assign learning paths to users and groups, for the groups they manage.
- View learning activity for the users in the groups they manage.
- Remove users from the groups they manage.
Providing group admins with add permission enables them to add users to groups they manage, if the user already has a Udemy Business license.
Providing group admins with invite/deactivate permission enables them to:
- Invite new users to the organization via the Invite New Users button, for the groups they manage.
- Invite users in bulk via CSV upload.
- View pending invitations to groups they manage by going to the Pending Invitations tab
- View deactivated users in groups they manage by going to the Deactivated Users tab
- Deactivate users from the organization, through the groups they manage
Learn how to:
- Invite users to your Udemy Business account and resend pending invitations.
- Manage roles and permissions in Udemy Business.
Detailed group admin permissions
Admins Group admin Add existing users to groups Yes Yes: only if they have permission to add existing users to groups they manage Add users via the CSV import feature Yes Yes: only if they have permission to invite and deactivate users from groups they manage Approve email domains Yes No Approve, reject, publish custom courses Yes Yes Assign courses to groups Yes Yes: only for groups they manage Assign courses to users Yes Yes Create new groups Yes No Delete groups Yes No Deactivate users from Udemy Business Yes Yes: only if they have permission to deactivate users from groups they manage Designate other group admins Yes No Edit account settings Yes No Edit group membership for pending invitations Yes Yes: only if they have permission to invite users to groups they manage Import courses Yes No Invite new users to join Udemy Business Yes Yes: only if they have permission to invite users to groups they manage Make custom course categories Yes Yes Remove users from groups Yes
Yes, for groups they manage Resend or cancel pending invitations Yes Yes: only if they have permission to invite users to groups they manage See what courses members of their group are taking Yes Yes: only for groups they manage View and download the Group Membership Log* see below for more information Yes Yes: only for groups they manage View and run user adoption, user activity and course consumption reports Yes Yes: only for groups they manage View and run lab and assessment activity reports (Udemy Business Pro only) Yes
Yes: only for groups they manage
View and run Learner feedback, Ratings and reviews dashboards Yes No Create folders to organize public learning paths Yes
No
Frequently asked questions
Can group admins change their role from group admin back to user?
No, you can not edit your own role. A group admin will need to reach out to an admin to edit their role.
Can group admins view information from users outside of the groups they manage?
No, group admins only have access to users that are in groups they manage.
Can all group admins resend pending invites?
No, group admins can only view and resend pending invites if they have the permission to invite and deactivate users from groups they manage.
Can all group admins invite and deactivate users from groups they manage by default?
No, admins will need to select that permission for group admins when making someone a group admin for a group, or when editing user permissions or roles within groups
Who can access the Group Membership Log?
Admins can access the Group Membership Log for all groups. Group admins can only access the Group Membership Log for the groups that they are group admins for.
- Learn how to access and review the Group Membership Log.
-
How to create and manage license pools
Read articleThis article explains how admins can efficiently manage their Udemy Business account’s licenses by creating and leveraging license pools.
- Learn more about license pools.
- Learn how to assign license pools to learners.
Please note:
- License pools are exclusively available for Enterprise Plan organizations
Table of contents
- How to create license pools
- Editing or deleting license pools
- Granting users permission to invite from license pools
- Difference between membership and permissions to license pools
- Memberships and permissions for group admins
How to create license pools
To use the license management and allocation capabilities facilitated by license pools, there are two essential steps to take first.
- Create license pools to distribute available licenses
- Grant access to these license pools for group admins with the ability to invite others
Please note: Only admins can create license pools. This section will address the first one:
To create a license pool, please follow the steps outlined below:
1. Access the license pools option from the Manage users dropdown on the left of the Admin tools.
2. Click the Create license pool button.
3. Enter the following:
- Name: Give your license pool a name.
- Select group admins to manage this pool: Select which group admins you would like to be able to manage licenses for this pool.
4. Move users to this license pool: Enter the names of users, their email addresses, or groups to move users to this license pool. This step is optional.
- Allocate licenses for this pool: Here you can enter the number of licenses you’d like to allocate to this pool.
- Enterprise licenses: Enter the number of enterprise licenses to be assigned to users. Bear in mind this number represents the limit of licenses for this license pool. The maximum number accepted in this field is the number of enterprise licenses available in the main Enterprise subscription.
- Pro licenses: Enter the number of Pro licenses available to be assigned to users. This information is only visible to customers who purchased a Pro subscription. This number represents the limit of licenses for this license pool. The maximum number accepted in this field is the number of Pro licenses available in the main Pro subscription. Note: you cannot add more Pro licenses than Enterprise licenses to a license pool.
- Review how admins can add users to license pools via SSO (SAML) or SCIM methods.
5. Once you've entered the required information, depending on how you enter it you may see one of three different information boxes:
5.a. The information box below shows when you didn’t populate any numbers under the “Allocate licenses for this pool” inputs, but added users, and the system pre-populated it for you.
5b. Alternatively, you will see a yellow box appear if you don’t have available licenses in your pool - this will transfer licenses from other impacted pools to enable your change.
5c. Finally, the shorter yellow box appears when a change was made to the numbers you previously typed in the inputs due to the user selection.
6. You’ll see a final summary of the pool manager(s) and an overview of the number of Enterprise / Pro licenses set up for the pool created. If you have chosen to move users from other license pools, you will see the impact on those pools.
Finally, click Create to create your license pool.
After the license pool has been created, you can grant invite permission specifically for this license pool to group admins. This allows them to allocate licenses directly from this license pool. You can also move active users to this license pool to accurately reflect the pool's available license balance, by editing the license pool.
Editing or deleting license pools
To delete a license pool, change its name, or update its license limits, click on the ellipses icon (three-dots) next to the license pool name. Next, select the desired action.
Please note:
- The default license pool cannot be updated or deleted.
- If SSO or SCIM is used to manage license pools, deleting or changing the license pool name may cause errors unless the changes are reflected in your Identity Provider.
- When choosing the Edit license pool option, you will have the opportunity to define the following parameters, similar to the creation process:
1. Enter the following:
- Name: Enter the new name for this pool if you wish to change it. Only unique names will be accepted in this update
- Select group admins to manage this pool: Add or remove the group admin(s) to manage the pool.
2. Search users or groups: Here you can enter the users or groups you’d like to add to this license pool.
Allocate licenses for this pool:
- Enterprise licenses: When increasing the license limit, the number of licenses added must be available in the Default pool. When decreasing the license limit, the number of licenses must not be lower than the number of active users in the license pool.
- Pro licenses: Same as above.
You’ll see a summary of the users to be added before going to the next step.
3. View your Edits Summary for the license pool at a glance. Once you’re happy with the new allocation and impacted pools, click Save.
- When choosing the Delete license pool option, the available licenses and associated users from the deleted pool will be assigned to the Default License Pool.
Please note: A few points to consider if you choose to delete a license pool:
- All active users whose licenses are coming from this license pool will be assigned to the Default License Pool
- All available licenses (in other words, licenses who were not assigned to active users) from this license pool will be transferred to the default license pool increasing its limit
- Group admins who were granted permission to allocate licenses from this license pool will have this permission revoked and will allocate licenses from the default license pool
- Finally, deleting license pools is an irreversible action
- As noted above, if SSO or SCIM is used to manage license pools, deleting or changing the license pools name may cause errors unless the changes are reflected in your Identity Provider.
Granting users permission to invite from license pools
After license pools are created and licenses are distributed, it is time to grant access to the users who will allocate these licenses and invite users. You can also grant permissions to users while creating or editing a license pool. This permission is available only to group admins.
- Review how to manage roles and permissions in your Udemy Business account.
Once this option is selected, you will see a dropdown where you can specify the license pool this group admin can draw licenses from and assign licenses to users. Once selected, click the Save changes button.
Please note: Group admins can manage multiple groups but they may be granted permission to only one license pool. Difference between membership and permissions for license pools
Membership: When an active user is moved to a license pool or joins Udemy Business via a group admin invitation, their licenses are drawn from that pool, making them members. We also refer to members as users assigned to a license pool. Admins can view users assigned to license pools at any point by either using the license pool filter in the manage users section or from the license pools page.
- Learn how to assign license pools to learners.
Permissions: When an admin grants a group admin permission to allocate licenses and invite users from a license pool, this group admin now has permission to invite and assign licenses from this license pool. Admins can view a group admins’ permissions using the Edit role and permissions menu option for the user in the manage users section.
Example: an organization’s Udemy Business account includes a “Marketing” group that has two group admins. Group admin A could be inviting users from a license pool titled “North America” and group admin B could be inviting users from a license pool titled “EMEA”. The “Marketing” group could be used to assign marketing-focused courses, but the two license pools are used to assign the licenses paid for by two distinct regional centers.
Memberships and permissions for group admins
Group admins can be granted permission to a single license pool and as a user they can be assigned to one license pool only. It is important to know that these license pools may not necessarily be the same. For example, a group admin may be a member of the Learning and Development license pool and have permission to send invites from the Sales license pool.
-
Subscription overview: How to view your Udemy Business account’s license allocation
Read articleThis article explains how admins can manage and view the number of licenses used in their Udemy Business account subscription on the Subscription overview page.
- Learn how to add more licenses to your Udemy Business account.
- Learn how to manage licenses for your Udemy Business account.
- Learn how to configure email reminders for low license availability.
Accessing your Subscription overview
To access your Subscription overview page:
- On your Udemy Business account, navigate to Manage > Manage Users.
2. On the sidebar, under License allocation > Subscription Overview, you'll see a summary of the number of licenses remaining for your account.
Viewing Team Plan licenses
For Team Plan accounts, the sidebar also shows how many licenses you have remaining on your subscription and how to upgrade to an Enterprise Plan.
Click Subscription overview to see how many Team Plan licenses you’ve used so far.
Viewing Enterprises Plan licenses
Click Subscription overview to see how many Enterprise Plan licenses you’ve used so far. You’ll also see more detailed information about Udemy Business Pro and a button to request Pro licenses.
Viewing Udemy Business Pro licenses
For accounts with Udemy Business Pro, you’ll see the number of remaining Enterprise and Pro licenses in the sidebar.
Click Subscription Overview to see how many Enterprise and Pro Plan licenses you’ve used.
Click Manage Licenses to:
- Access user management for your account.
- Configure the automatic assignment of Pro licenses when Enterprise users request to access Pro content.
If you’d like to purchase more licenses, learn how to add more licenses to your account.
-
Removing a user from your account - deactivate user
Read articleIf an employee has left your organization, you can remove them from your account and an additional license will be freed up, which can then be utilized by a new employee.
If you need to remove a user from your account, please follow the steps below:
1. Select Manage Users from the Manage dropdown menu at the top of the page
2. Locate the user by entering their name or email address in the Search box that’s located under All Users
3. To remove a user from your account, click the ellipses (or actions menu) to the right of the user’s name and select Deactivate User.
You will be presented with further instructions and information on what it means to deactivate a user before confirming the deactivation.
Once deactivated, the user will no longer be able to log into your Udemy Business account via an email and password login.
Managing access for users from single sign-on (SSO) managed accounts
To prevent deactivated users from accessing your Udemy Business account via SSO, please have the team responsible for your SSO integration with Udemy Business, deprovision the users in your SSO Active Directory. Users who remain provisioned via your SSO Active Directory will continue to have access to your Udemy Business account through SSO, even if they are deactivated in the account by an Admin.
If you need to prevent deactivated users from accessing your Udemy Business account via SSO, but require that they remain provisioned in your SSO Active Directory, please click here to contact our Support Team for assistance.
Important: SSO managed accounts that utilize System for Cross-domain Identity Management (SCIM) are only able to deprovision users directly from the SSO Active Directory. For more information, read about automating user and group management with SCIM.
Deactivated users in Insights and Reports
For deactivated users, all the data associated with their learning and the use of their account will be retained in your insights and reports. You can access a list of all your Deactivated Users in a filter on the left sidebar menu of the Manage Users area.
Deactivating users with Pro licenses assigned (Udemy Business Pro only)
If an employee has left your organization, you can deactivate them from your account. If you deactivate a user who was assigned a Pro license, then their Udemy Business license and their Pro license will be freed up, which can then be utilized by a new employee. Additionally, Udemy Business Pro reporting will be retained for this user.
Users assigned Pro licenses can have their individual Pro licenses removed or can be deactivated.
Reactivating users
If you need to revert a deactivation (eg. made a mistake), or if you wish to have a user returned to the account after being temporarily deactivated, you can use the option to Reactivate User. Learn how to reactivate a user who was previously deactivated.
Anonymizing users
If you wish to permanently remove a user’s Personal Identifiable Information (PII) for GDPR compliance or a similar purpose, you can do so once the user has been deactivated. Learn how to delete a user’s PII.
-
Deactivating or reactivating users in bulk
Read articleIf your organization wishes to deactivate or reactivate users from your organization’s Udemy Business account in bulk, please contact our Support Team so we can assist with coordinating the process.
To help our team assist you more quickly, we recommend submitting a file in your request that includes the email addresses of the users you are deactivating or reactivating. The image below shows an example of how the file should be formatted.
Important note regarding bulk deactivation requests
When submitting a deactivation request to our team, please be sure to confirm whether you wish to anonymize the users (completely remove their information from our system) or just deactivate them from your organization’s Udemy Business account.
Please note that if you choose to anonymize the users from the account, their Personal Identifiable Information (PII) will be permanently deleted from your account. There is no way to retrieve the PII data for an anonymized user, and deleting the User PII is irreversible, meaning we will not be able to retrieve learner history, course enrollments, or reactivate or restore their accounts.
Deactivating or reactivating users via the Manage Users page
Users can also be deactivated or reactivated, one by one, via the Manage Users page. Instructions on how to do so are available in the resources below.
-
Reactivating deactivated users
Read articleIf you wish to temporarily deactivate a user and then return them to your Udemy Business account (eg. employees on long vacations, reinstatement of contractors), or if you need to revoke deactivation (eg. the user was deactivated by mistake), reactivation options are available.
- After a user is reactivated, they will retain the role, groups and permissions they held at the time of deactivation and they can resume taking courses where they left off.
Please note that you can only reactivate a user if they have been deactivated. To review who is inactive, use the Deactivated filter in the sidebar menu of the User management page.
- Learn how to navigate to the User management page.
Table of contents
- How to reactivate a user in your Udemy Business account
- Reactivation notifications
- Reactivating deactivated users with Pro licenses assigned (Udemy Business Pro only)
How to reactivate a user in your Udemy Business account
Accounts that log in via email and password
1. Click on the ellipses (or actions menu) to the right of the user’s name and select Reactivate User.
2. You will be prompted to confirm the reactivation. Once a user is reactivated, they will be automatically allocated a license again and can access their account as they did before.
Accounts that require SSO login
If your users must access their Udemy Business account through single sign-on (SSO), then how they can be reactivated will depend on whether you have enabled the automatic reactivation option in your Udemy Business SSO settings (see below).
- Automatic reactivation option is disabled: you will need to reactivate the user in your Identity provider as well as manually in your Udemy Business account (by following the same steps outlined for accounts accessed via SSO or email and password).
- Automatic reactivation option is enabled: you will need to reactivate the user in your Identity provider only. The user will be automatically reactivated when they log in to their Udemy Business account once again via SSO.
Accounts provisioned through System for Cross-domain Identity Management (SCIM)
For Udemy Business accounts managed via SCIM, you must reactivate the user directly in your organization’s identity provider (provided the user’s personal identifiable information has not been anonymized).
License pool requirements for reactivating users
For customers who created license pools for their Udemy Business account there are several requirements when reactivating users.
- Learn more about license pools.
- Learn how to assign license pools to learners.
Please note: the license pools feature is currently in beta mode. We are working towards making it available to all organizations in the future. If this is of interest to your organization, we recommend connecting with your account’s Customer Success partner to learn more. Impacts to license pool licenses when users are deactivated
When users are deactivated, they remain assigned to the license pool they were originally allocated to, but they no longer utilize licenses from it. Admins can manage this allocation when reactivating users by choosing to maintain the original license pool, or selecting a different one from the dropdown option under Manage Licenses.
Users can only be reactivated within license pools that have available licenses. If no licenses are available, you can either increase the license pool’s capacity or deactivate a user. Please note: per Udemy’s license policy, licenses may only be reassigned if the deactivated user has left the company or changed roles. Mid-contract license recycling is otherwise not permitted. (The same applies to user accounts that require SSO login or are managed by SCIM.)
- Learn how to edit a license pool.
No licenses available: admin experience
If the license pool to which the user belonged before deactivation has no available licenses during reactivation, an error message will be displayed. This message alerts the admin that reactivating the user in the current license pool is not possible, until additional licenses are made available. Admins also have the option to change the license pool during this process.
No licenses available: Group admin experience
The license pool for group admins who can manage users is automatically determined based on their invite permission. If this license pool has no available licenses during reactivation an error message will be displayed. This message alerts the group admin that reactivating the user is not possible, until additional licenses are made available.
Please note:
- If the user’s license pool was deleted, their license will be drawn from the default license pool when they are reactivated.
- Only admins have visibility and control over license pools. The license pool for group admins who can invite users is automatically determined based on their invite permission. Therefore, the option to select license pools is omitted.
- Learn how to create and manage license pools.
Reactivation notifications
You can also choose to send an email notification to the reactivated user notifying them that they can access Udemy Business again. Please note: The language of the email confirmation will match the language set for the user's account.
Reactivating deactivated users with Pro licenses assigned (Udemy Business Pro only)
If the deactivated user was previously assigned a Udemy Business Pro license and then reactivated, you will be required to re-assign the Pro license to the user to ensure they can access Pro features.
If you have purchased Udemy Business Pro licenses for all the users in your organization’s account, when a user is reactivated, they’ll automatically be assigned a Pro license if one is available.
-
How to delete or anonymize a user’s Personal Identifiable Information (PII)
Read articleIf you wish to permanently remove (i.e., anonymize) a user’s Personally Identifiable Information (PII) for General Data Protection Regulation (GDPR) compliance or a similar purpose, you can do so once the user has been deactivated.
Deleting User PII will make the user’s personal information anonymous but it will keep an aggregation of their usage history for reporting purposes. This means that their number of enrollments and course minutes consumed, will be included in the total number of all enrollments and course minutes consumed for the organization. The data, however, won't be linked back to the individual user name, any group they were in, or course name they took.
How to delete (i.e., anonymize) user data
To permanently delete a user’s PII you must first deactivate them. To learn how to deactivate a user, click here. For System for Cross-domain Identity Management (SCIM) managed accounts, learners must be deactivated (i.e., deprovisioned) directly from your Single Sign On (SSO) Active Directory.
Once the user is deactivated you can use the same actions menu to the right of their listing and click the Delete User PII option in the menu. You will be presented with further instructions and information on deleting a user’s PII and you will need to click the checkbox to confirm that you understand.
How to select multiple deactivated users
You can select multiple deactivated users by clicking the checkbox on the left of the deactivated user. This will give you the option to Delete User PII for multiple users.
How anonymized users appear in Udemy Business
Deleting a user’s PII will remove all identifiable information for that user and replace all references to them in Udemy Business with a label called ‘Anonymized User.’
The total count of users who've had their PII deleted will be shown in a notification on the Deactivated Users page. The Deactivated Users filter can be accessed in the License allocation section under Manage Users.
You can see aggregated data in reports for anonymized users whose PII has been deleted. Please note: there is no way to retrieve the PII data for an anonymized user and no way to link them to courses or groups. Deleting User PII is irreversible.
Licenses & permissions
-
Managing Udemy Business licenses
Read article -
Inviting users
Read article -
Adding more licenses to your account
Read article -
Managing roles and permissions in Udemy Business
Read article -
Email reminders for low license availability
Read article -
License pools: Adding users with SSO / SCIM
Read article -
License pools: Features, benefits, and applications
Read article -
Assigning license pools to learners
Read article -
What can group admins do?
Read article -
How to create and manage license pools
Read article -
Subscription overview: How to view your Udemy Business account’s license allocation
Read article -
Removing a user from your account - deactivate user
Read article -
Deactivating or reactivating users in bulk
Read article -
Reactivating deactivated users
Read article -
How to delete or anonymize a user’s Personal Identifiable Information (PII)
Read article