This article outlines how Udemy Business admins and group admins can invite new learners to join the account, and steps they can take if invitations are not being received.
Table of contents
- How to invite users
- How to invite users via the individual email addresses option
- How to invite users via the bulk CSV import option
- Inviting and assigning users a Udemy Pro license
- Selecting a language for your invitations and including a customized message
- Allowlisting emails
- How users accept their invitations
- Invitations and license usage
- What to do if invitations are not being received
- Pending and resending invitations
- Resending multiple invitations
- Single Sign-On (SSO) accounts
- SCIM (System for Cross-Domain Management) accounts
How to invite users
To invite new users, navigate to the Manage tab at the top right of your account and click on Manage Users from the dropdown menu. Users can be invited via the Individual email address option or by CSV import (note: only admins can use the CSV import option).
1. Click the Invite New Users button
2. Click on Individual email addresses to invite people one by one.
3. To bulk import users via a CSV import, click on Import users from CSV. Please note: Currently only admins have access to the CSV import feature.
How to invite users via the individual email addresses option
1. After navigating to the Manage users page, click the Invite New Users button.
2. Next, add individual email addresses to invite people one by one.
3. For customers who created license pools for their Udemy Business site:
- For admins: Select the license pool from which the invited users licenses should come from
|
Please note: Only Udemy Business admins have visibility and control over license pools. The license pool for group admins who can invite users is automatically determined based on their invite permission therefore the option to select license pools is omitted.
|
4. For customers who have purchased Udemy Business Pro to assign Pro licenses:
-
- If you wish to assign a Udemy Business Pro license to the invited users, click the checkbox for ‘Pro license’ under Select License add on. This will automatically give the selected learners access to Udemy Business Pro features when they accept their invitation to join Udemy Business
|
Please note: For customers who have acquired Pro licenses for all Udemy Business users, the 'Pro license' checkbox will be automatically selected and disabled. This ensures that Pro licenses are automatically assigned when invitations for Udemy Business are accepted.
|
5. If you wish to add the invited users to specific groups, select them from the list.
6. Finally, select the language you would like to issue your invitation in and add a custom message if you wish (please see below for more information). Click Send invitations.
How to invite users via the bulk CSV import option
- Learn how to add and manage users via CSV import.
Inviting and assigning users a Udemy Pro license
- Learn how to assign and remove Udemy Business Pro licenses.
Selecting a language for your invitations and including a customized message
Admins and group admins can also select the language of the invitation they are sending and include a customized message if they wish.
- Please note that while the invitation template will be localized in the language you’ve selected, any customized message you include will not be translated into a different language.
After you select a language, the invitation and following invitation reminders will be issued in that language to the user indicated.
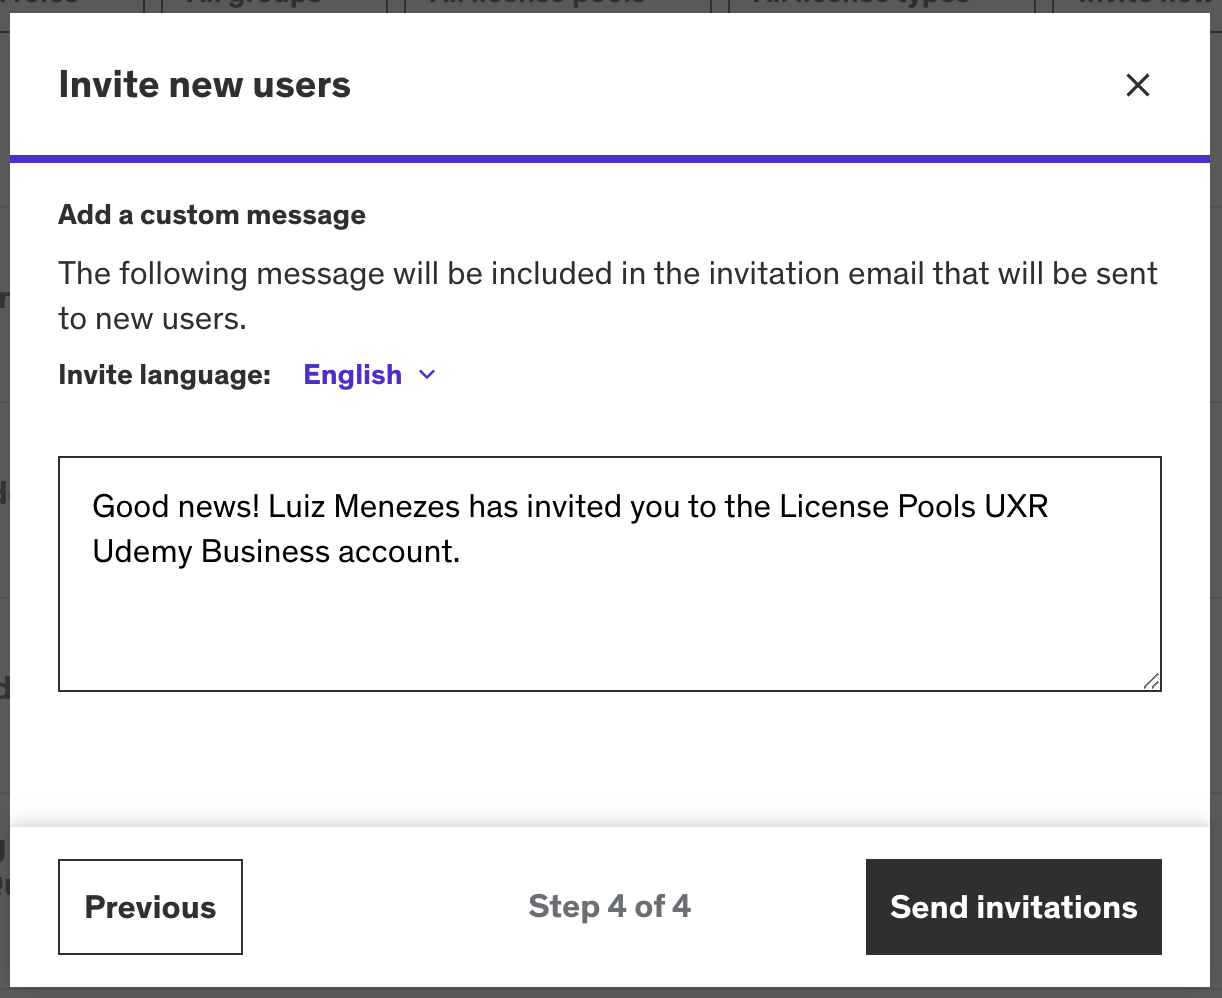
If you choose to add a custom message it will appear at the top of the invitation.
Allowlisting emails
If your company's firewalls are generally restrictive (certain commonly used sites are blocked), you will need to allowlist certain emails from Udemy Business to ensure delivery of invitation emails and operation of the password reset function. Learn more about allowlisting the email sending domains and subdomains for Udemy Business.
How users accept their invitations
Invited users will receive an invitation via email to join Udemy Business. The subject line of the email will include your company's Udemy Business account name; for example, Invitation to Company's Account. The invitation email will be sent from e.udemymail.com, but the email address of the admin who sent the invite will also be shown before that address. For example, john.smith@company.com via e.udemymail.com.
After inviting users to your account, an invitation email will automatically be sent to those users. The email will link users to your Udemy Business account, where they’ll enter their name and email, create a password. Users will be prompted to verify their account information, via a verification email with a link, which will expire in one hour*. Once they activate their account through a verification email, they’ll be able to log in for the first time, and start learning. If the user does not respond to the invitation email within 48 hours, the system will automatically send an invitation reminder to them.
*Please note that Single Sign-On (SSO)/System for Cross-Domain Management (SCIM) users will not be put through this verification flow.
Invitations and license usage
Invitations do not consume a license until the user has signed up for their account. If a license is no longer available by the time the user tries to sign up, the user will land on an error message page. On the error message page they will be asked to contact the administrator who invited them for further assistance.
For customers who have purchased Udemy Business Pro licenses for all users, Pro licenses will be automatically assigned when invitations are accepted by users, or when they authenticate via SSO/SCIM.
What to do if invitations are not being received
If your users are not receiving email invitations to join your account, please have them check their spam folders. If they still do not receive any invitation emails, and your organization has allowlisted the Udemy Business emails, please have them contact our Support Team directly for further assistance.
Pending and resending invitations
To view the Pending invitations page, click Pending invitations at the top left-hand of the Manage users screen.
On the Pending invitations page, you can check who has not yet accepted their invite, and resend or cancel an invitation for an individual user, by clicking the applicable icon. You can also resend pending invitations to all users at once by clicking Resend all on the right side of the page.
The name of the inviter will also appear in pending invitations, if they sent individual invitations or uploaded the user's email address in bulk through the CSV import. If you sent the invitation to the user it will read "Invited by me".
Resending multiple invitations
To resend multiple invitations, you can select multiple users by clicking the checkbox on the left. Once a selection is made, a panel will appear where you will have the option to resend or cancel multiple invitations.
Please note: Internet Explorer does not allow copying and pasting from Excel into field 1 of the inviting users tool. Users will need to use Chrome or another browser.
Single Sign-On (SSO) accounts
If you have configured SSO and have enabled auto-provisioning in your Settings for SSO, you can grant users access to Udemy Business in your organization’s Identity Provider. You do not need to invite users one by one within your account, nor do you need to import them through a CSV file.
If you have auto-provisioning disabled, however, you will need to invite users via the above methods (in addition to provisioning access via your SSO directory).
SCIM (System for Cross-Domain Management) accounts
If you have enabled SCIM for provisioning, you can grant users access to Udemy Business in your organization’s Identity Provider and do not need to invite users one by one.